- Top Results
See all results
- Bosch Building Technologies
- Security and Safety Knowledge
- Security: Access Control
- AEC: How to activate a relay output using Advanced I/O
Turn on suggestions
Auto-suggest helps you quickly narrow down your search results by suggesting possible matches as you type.
Showing results for
AEC: How to activate a relay output using Advanced I/O
Options
- Subscribe to RSS Feed
- Bookmark
- Subscribe
- Printer Friendly Page
- Report Inappropriate Content
Scenario
User needs to activate a relay when the door is held open, but they do not have an I/O board.
Solution
Create an One Shot Advance I/O event to trigger the relay output desired. See below step by step how to do it.
Create a “Criteria” specifying the event we want to use to activate the relay output
- Go to “Configuration” and then “Criteria”

Figure 1.
- Click the “green plus” to create a new Criteria

Figure 2.
- Under description assign a name
- In this example, the user only wants one door to trigger one relay, Click “Selected Devices Only”, select the desired door and add it to the “Selected Devices” column
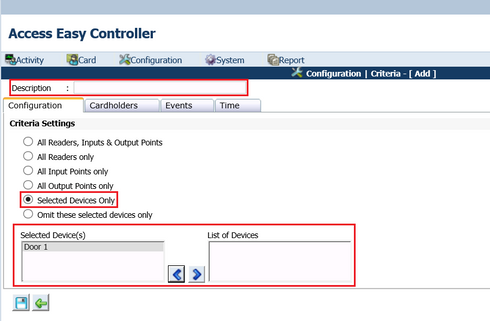
Figure 3.
- Click the “Events” tab
- The user only wants the relay triggered by one specific event: “Door held open”. Click “Selected Events Only”. Add the desired event to the “List of Selected Events” column
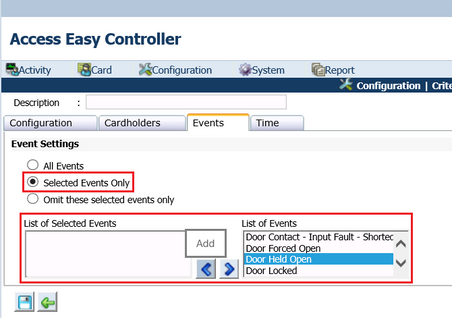
Figure 4.
- If this action is desired to happen only in one specific schedule, click the “Time” tab and choose the desired schedule.
- Click Save
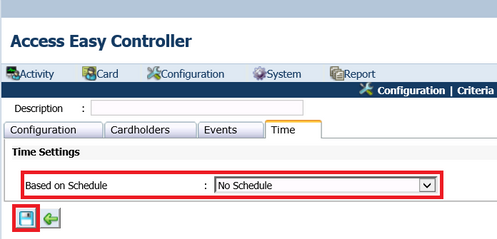
Figure 5.
Create an Advanced IO to assign the Criteria for activating the relay output
- Go to “Configuration”, and click “Advanced IO”
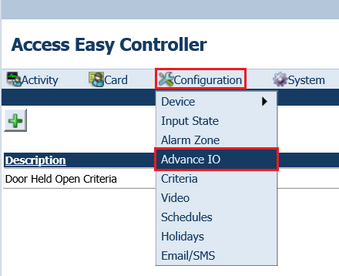
Figure 6.
- Click the “green plus” to create a new one

Figure 7.
- Under description assign a name for the new Advanced I/O
- The function needed is “One Shot”
- Select the output duration desired
- The “Input Control” is the criteria previously created. Click the edit button, select “Criteria” and the name assigned to the Criteria
- The “Output Link” is the relay output we want to activate. Click the edit button and select the relay output desired.
- Click the save button
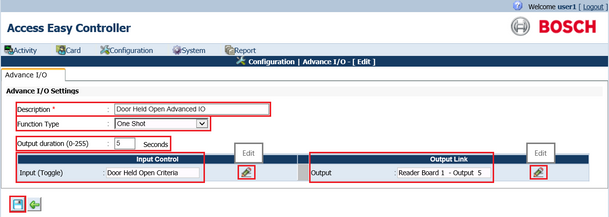
Figure 8.
Rate this article:
Still looking for something?
- Top Results
See all results