- Top Results
- Bosch Building Technologies
- Security and Safety Knowledge
- Security: Video
- How to activate a BVMS v11 and above Lite demo license?
How to activate a BVMS v11 and above Lite demo license?
- Subscribe to RSS Feed
- Bookmark
- Subscribe
- Printer Friendly Page
- Report Inappropriate Content
Trying out the BVMS Lite is easy!
Download BVMS Lite from the Download Area and use the quick installation guide to set-up the system.
BVMS Lite contains
-
8 video channels
-
2 workstations
-
1 DVR
-
2 keyboards
-
1 MVS
-
1 intrusion panel and can be used without a time limit.
BVMS Lite can be expanded to 42 channels using license extensions.
A step-by-step instruction on how to install the BVMS Lite demo license can be found to this page.
Step-by-step guide
Retrieving the System fingerprint
1. Open your BVMS Configuration Client application and sign in with the BVMS administrator user account.
After you successfully logged in, you see the following BVMS message. It tells you that the system is currently running in an unregistered mode and that you have to activate your license package.
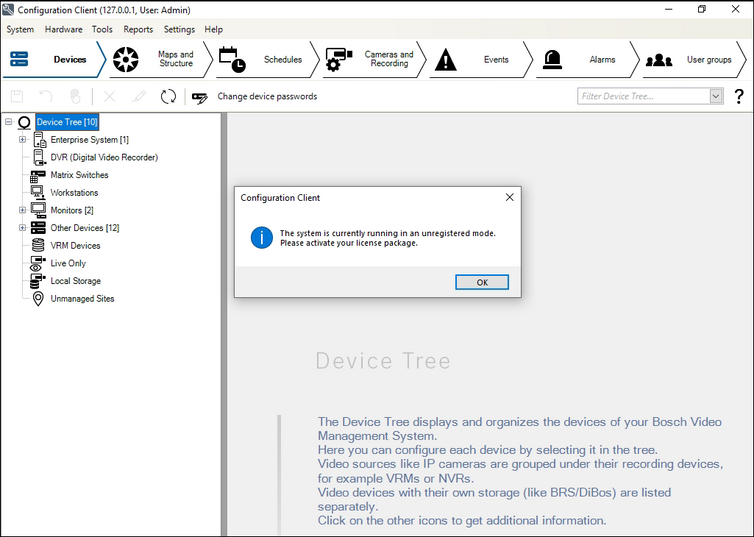
2. Click on the OK button.
3. Click Add... to enter the Add license dialog.
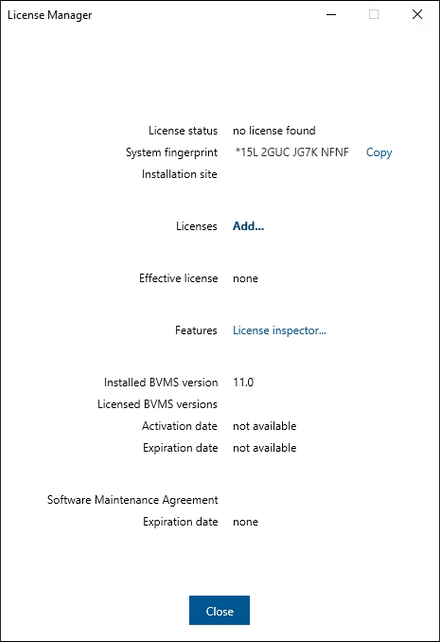
4. Click on the Save... to save your SystemInfo to a file.
Click the Save button and a file with the SystemInfo is created. Save the SystemInfo file on your computer.
Note: If you do not have internet access on the computer where your BVMS application is installed, transfer the SystemInfo file to a computer with internet connection.

Activating the license
1. Browse https://remote.boschsecurity.com and login with your credentials.
If you don't have an account create a new one. Fill in the required details on the form.
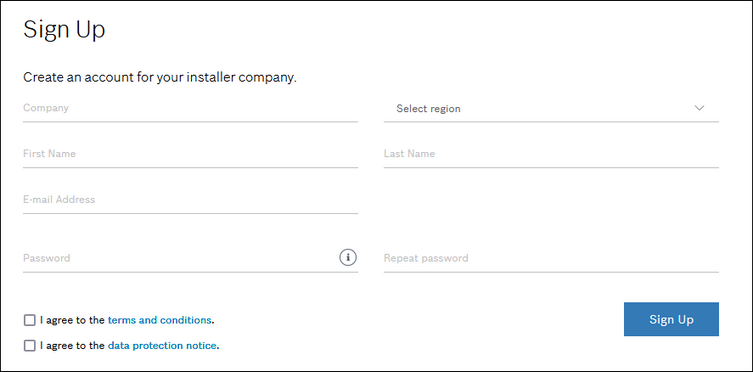
1.1 After clicking the "Sign Up" button an activation link is send to your e-mail address.
1.2 Check your email account for the activation e-mail. Once you receive it, click on the activation link. You will be redirected back to the main login page of the Remote Portal with an additional message: “Your account has been successfully activated. From now on you can login in with your email and password”.
2. Click the link https://remote.boschsecurity.com/softwarelicensing or directly go to the Software Licensing tab in the Remote Portal toolbar. The following screen displays:
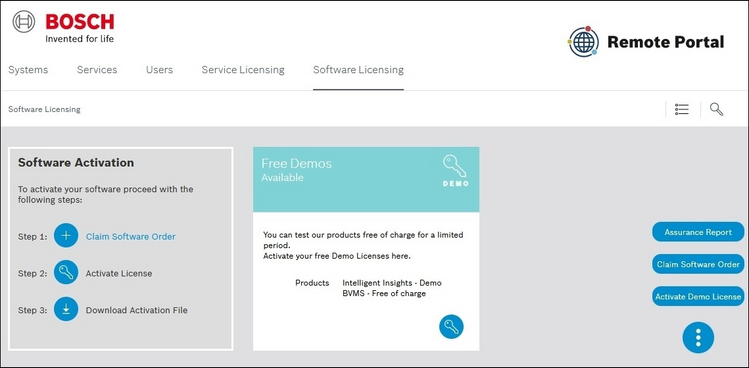
3. In order to activate a demo license, click Activate Demo License in the bottom right corner of the display. The Activate Demo License window displays. Upload the SystemInfo file that you saved earlier. Fill in the required information as displayed in the screenshot.
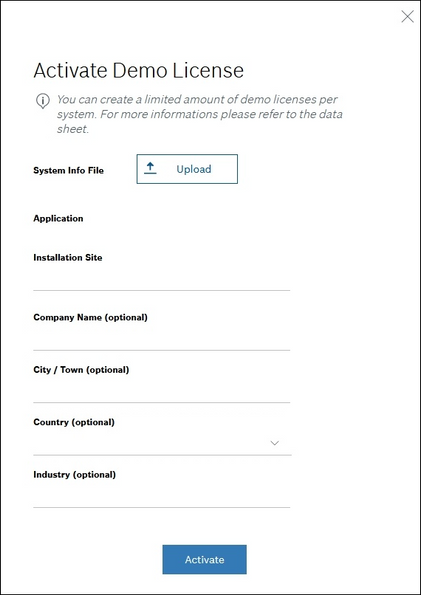
4. Click the "Activate" button to generate a license key.
5. After you successfully activate your license, you will see the following license dashboard in the Remote Portal. Click Download button to download the activation file and save it on your computer.
Note: If your BVMS application is not installed on the same computer where your activation file is saved, transfer the activation file to the computer with the BVMS application.
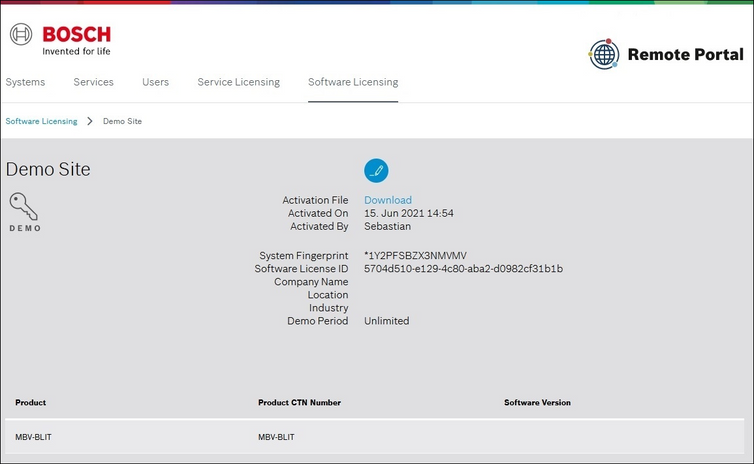
6. Upload the generated activation file.
Go back to your BVMS Configuration Client application and click the Open button under STEP 5 to upload your activation file.
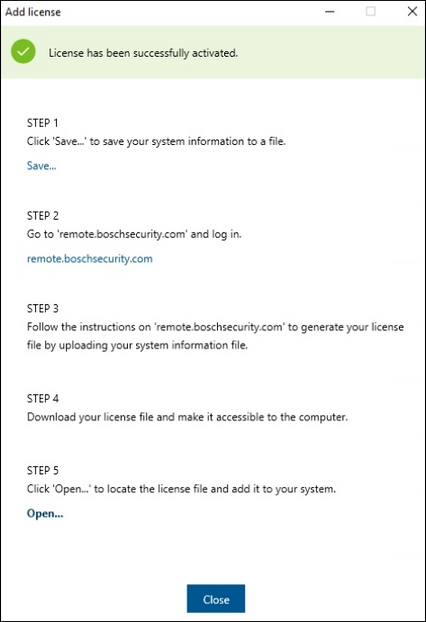
After successfully uploading your activation file, the license status changes to “activated” and your license information displays.
Your system is now ready to be used.
NOTE:
Please note that might be situations when the "Open" button is not displayed, similar with the picture below:

This happens due to the display resolution you have. Please change the scale to 100% and resize the Display resolution for the "Open" Button to be displayed.
Still looking for something?
- Top Results